Wednesday, July 4, 2012

Guilt-Reduced Apple Pie Muffins

My mom has always been the pie-maker in the family, always there for each and every season to bring a sweet and delicious fruity creation to our table. A skill she must have picked up from my pie-making grandmother, my mom makes all of my favourite pies including apple, peach, strawberry, blueberry, and an assortment of other mixed fruit creations that drive me wild! Since being promoted at her job, my mom has had less and less time to make pies, and I've had to step up my baking game to keep my family's sweet tooth satisfied. Having never had any luck with pie-making myself, I wasn't exactly looking forward to trying my hand at rolling out that dough that never seems to fit the pie plate. How come the pies that I've made never look like the picture perfect creations you see in magazines and on TV? And how come my mom seems to be able to replicate those beautiful fluted edges with such ease while I complain and struggle? I'll never understand it.

Some may say I gave up at this point, but I choose to think of it as "adapting". Instead of going through what I consider to be agony, struggling to roll out that darned pie dough, I decided to switch up the recipe. I wanted to keep the same flavours that you find in a traditional apple pie, but get rid of the labour and mess (just imagine all that flour and dough stuck to your countertop!) that comes with preparing the dough. Being so incredibly sick of the pub food that I get 50% off of at work, I also liked the idea of making a sweet snack that I can take to work with me so I wouldn't have to eat another frozen chicken finger. After doing some research I decided to make Food.com's recipe for Apple Pie Muffins, but get rid of the guilt that comes along with eating pie, by swapping out some ingredients and adjusting the flavours and textures to my liking. The muffins turned out great! Despite being "guilt-reduced", my Apple Pie Muffins totally satisfied my apple pie craving as a late night snack, as well as being the perfect little sweet treat to munch on at work! I also loved that I could happily eat a second muffin without feeling that same guilt that comes along with eating a second helping of pie. So say farewell to the dreaded rolling pin this time around, and make life a little easier and sweeter for yourself and whip up a batch of my Guilt-Reduced Apple Pie Muffins! 

Note: This recipe was updated on October 27, 2015. Click here to see the updated recipe!

Recipe adapted from Food.com
Ingredients:
Topping
1/4 cup firmly packed brown sugar
1/3 cup all-purpose flour
1/3 cup rolled oats
1/4 cup butter, melted
1 1/2 tsp cinnamon
Muffins
1 1/4 cups firmly packed brown sugar
1/3 cup vegetable oil
1/3 cup apple sauce
1 egg
1 1/2 tsp vanilla
1 cup all-purpose flour
1 1/2 cups whole wheat flour
1 1/2 tsp cinnamon
1 tsp baking soda
1/4 tsp salt
1 cup buttermilk
3 cups shredded firm and tart apples, with a bit of lemon juice squeezed on top

Directions:
  1. Make the muffin topping by stirring together the brown sugar, all-purpose flour, rolled oats, melted butter, and cinnamon in a small bowl. Set aside.
  2. In a large bowl whisk together the brown sugar, oil, apple sauce, egg, and vanilla until smooth.
  3. In a separate bowl sift together the all-purpose flour, whole grain flour, cinnamon, baking soda, and salt. Some of the whole grains from the flour may get caught in the sifter so just toss those remnants in with the rest of the flour after. 
  4. Stir oil mixture into flour mixture alternately with buttermilk.
  5. Fold in the shredded apples, until just combined.
  6. Using a retractable ice cream scoop, spoon in the batter into a lined muffin tin so that the cups are almost full.
  7. Sprinkle the topping evenly over all of the muffins and bake in a 350º oven for 25-30 minutes, or until golden brown.
Listening To:
Edward Sharpe and the Magnetic Zeros - Home

Powered by mp3skull.com


Wednesday, June 13, 2012

Ocean Wise: Tides of Change

Before fleeing off on my Israeli adventure, I had the opportunity to attend Ocean Wise: Tides of Change, an event held by the Vancouver Aquarium Conservation Program to raise awareness on how Canadian chefs are reshaping the culinary scene using Ocean Wise choices. The event, which was held at Luma, a new addition to the group of about 50 Ocean Wise partners in Toronto, emphasized the need to make ocean-friendly choices for the health of our oceans. With depleting seafood stocks becoming a critical issue (an estimated 90% of all large, predatory fish are gone from the world's oceans), and consumer interest in sustainable seafood, there was no better time for concerned industry representatives, including celebrated chefs Martin Kouprie, Dan Donovan, and Brad Long, writer and sommelier Jamie Drummond, and sustainable seafood advocate Rebecca LeHeup to form the Ocean Wise Advisory Team in Toronto - A team charged with examining the local culinary marketplace and uncovering ways to further engage and educate consumers on the issues surrounding our oceans.
The event highlighted the important work that the Advisory Team is responsible for, as well as informing guests about the many sustainable seafood options that are available to us, and of course what unsustainable seafood we should stay away from. We were introduced to both familiar and unfamiliar sustainable seafood options that stretch across Canada through a delicious and striking tasting menu created by Luma's Executive Chef Jason Bangerter. Taking us across Canada, Chef Bangerter allowed us to taste two different types of fish from each region of Canada through his artfully plated savory seafood creations. Each dish was absolutely delicious, truly showcasing the fresh Canadian fish as the star of each dish, while representing it in a unique and visually appealing way.
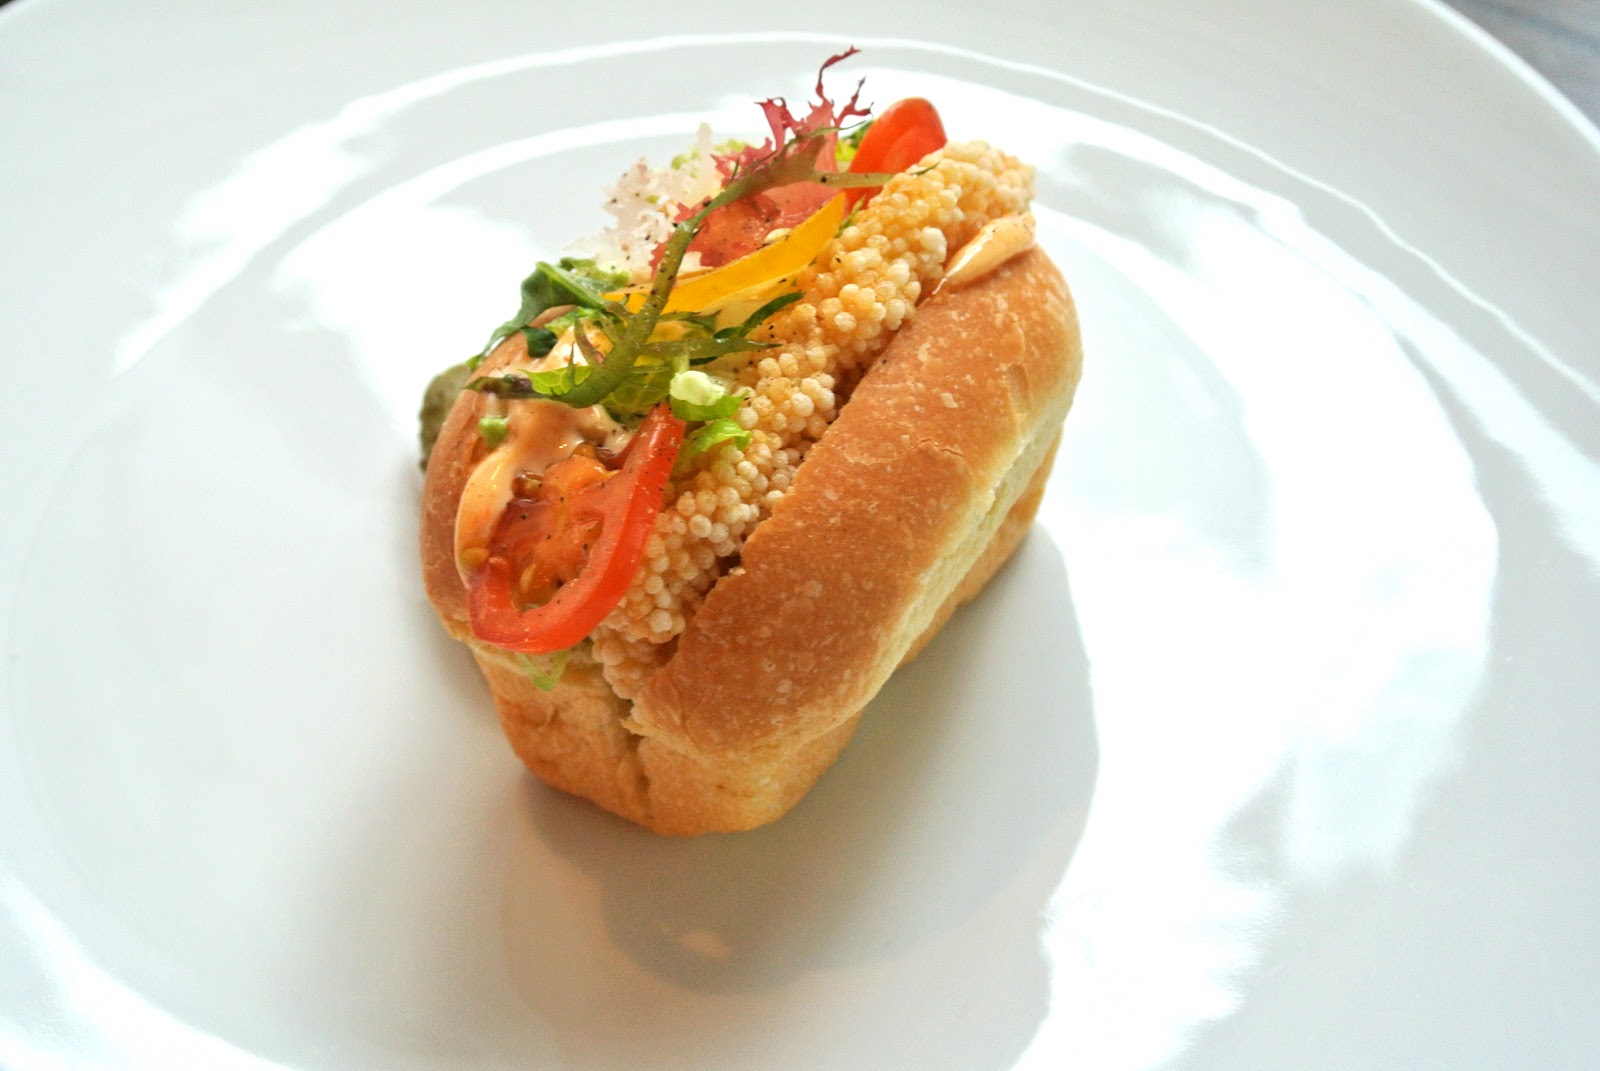
Fried Lingcod Po-Boy
seaweed, spicy mayonnaise
Spot Prawn Tartare
chili, mint, coriander
Warm Glazed Mussels
ramp leaves, beech mushroom, béarnaise
Salt Cured Arctic Char
citrus, ginger, basil
Poached Trout Salad
peas, herbs, pickles
Smoked White Fish Fritters
wild leek, daisy caper rémoulade
To learn more about Ocean Wise and sustainable fish in Canada, check out the Ocean Wise website!

Listening To:
Robyn - Dancing On My Own

Powered by mp3skull.com

Wednesday, June 6, 2012

Homemade Lemonade

When life hands you lemons, make lemonade. With my house up for sale and real estate agents telling us to decorate our kitchen with a big bowl of lemons, the old saying has become very literal for me. I can't believe that after all this time and preparation, the very long process of putting our family home up for sale is nearing its end. Despite how long we've been preparing for this both mentally and physically, it's still a pretty sour situation. I'm not gonna lie, it totally sucks spending your last few months with your home/pool surrounded by painters, contractors, bickering family members, and real estate agents, all the while being prepared to up and drop everything at a moments notice to prep the house for spontaneous showings. I hate it. I hate that the place that I've called my home for my whole life will soon be someone else's, I hate how unclear my future looks right now, and, worst of all, I hate to see how all of this is affecting my parents. I've never been that person who has the right thing to say to offer words of comfort, so instead I always turn to food and drinks to express my compassion. So after a week of glaring at that damn bowl of lemons with distain, a constant reminder of the flux my family and I are all in, I yanked out the dusty citrus juicer and went through almost the entire bowl of lemons to make a pitcher of refreshing lemonade.

Having never made lemonade from scratch before, I was surprised at how easy it was to turn that lip puckeringly sour lemon juice into a sweet and delicious outdoor bevvie. Squeezing those lemons turned out to be pretty therapeutic for me, just as everything else I've cooked or baked in the past month have helped to sooth me. That saying kept repeating in my head: "When life hands you lemons, make lemonade", ie. when life hands you a sour situation, it's in your hands to turn it into something sweet. Despite the chaos in my life right now, deep down I know that this is all for the best. I know my family needs to move on, I know that this change will help to take myself and my family in the direction we need to go, and I know that in the end this experience will help me grow. The situation isn't going to change, so it's up to me to change how I perceive it and turn it into something positive. No, it's certainly not going to be as easy as making lemonade, but at 24 years old, I know the importance of trucking along, looking for the best in every situation, and learning from each experience I go through.

With the stress of work, home, family, and health on our minds, those few moments in my backyard with my mom, sipping on ice cold lemonade in the sun, helped to take our minds of all of the sour for just a moment and appreciate something sweet.

Note: I like some lemon pulp in my lemonade, but if you prefer yours pulp-free, simply strain it out with your seeds.

Ingredients:
1 cup sugar
1 cup water
1 cup lemon juice (about 6 lemons), with pulp
3-4 cups cold water
lemon slices, for garnish (optional)

Directions:

  1. In a small saucepan set to medium heat, add the sugar and 1 cup water, stir to combine and cook until sugar has dissolved (about 5 minutes).  Remove from heat, transfer to a container and chill. This is called a simple syrup and can be added to sweeten any cold drink.
  2. Make the lemonade by pouring the lemon juice and pulp into a large pitcher.  Add 3 cups of the cold water and half of the simple syrup. Add more sugar and water to your liking until you have your perfect lemonade! Stir in some ice, garnish with lemon slices, and serve immediately. 

Listening To:
Cults - Go Outside

Powered by mp3skull.com

Klondike Rose - Jalapeño Popper-Inspired Twice Baked Potatoes

Nothing like answering the door to a FedEx delivery man stating "a box of potatoes for a Danielle Rose....", amazing! When I was contacted by Earth Fresh to work with them on their Klondike Rose Potatoes contest, I jumped at the chance to be involved! Potatoes are always a staple at my house during the summer whether its a baked potato alongside steak, potato salad at our barbecues, homemade french fries, or good ol' home fries with breakfast, potatoes pretty much become part of the Rose family all summer long! Because I've come up with so many delicious potato recipes in the past, I have a tendency to go back to those recipes time and time again, or adjust them just slightly to suit what I have on hand. I love getting to taste my favourite potato recipes again and again, but I've been itching to try something new.  The Klondike Rose Potato contest was the perfect kick to get my potato wheels a turnin' to come up with a new and unique recipe using these delicious red skin golden flesh potatoes. 

Because I missed Cinco de Mayo this year while I was enjoying my falafels in Israel, I haven't been able to get jalapêno poppers, my 2011 Cinco de Mayo dish, out of my head!  With jalapeño poppers on the brain, my Klondike Rose Potato recipe really couldn't go in any other direction, I knew the flavours and textures would be great together! Having never tried this recipe before, improvising as I went, with a deadline on my heels, I was a little nervous that the dish wouldn't turn out. Would the potatoes be too spicy? Bland? Would the texture be off? Would they look nice in a photo? The easiest way to set your nerves aside is to simply begin tasting.  Taste every single step that goes into those potatoes and you can't go wrong!  My potatoes turned out to be a huge success! My family and I absolutely loved the flavours, textures, and even the presentation! What's better? Leftover potatoes can be kept in the fridge to be wrapped in tin foil and popped in the oven when ready to eat, and they still taste fantastic! Because of their smaller size and festive filling, I love the idea of serving these spicy potatoes up for guests at a backyard barbeque to show up the typical potato salad side.  Thanks to Earth Fresh Klondike Rose Potatoes for inviting me to take part in this fun contest!

Tip: I learned the hard way to wear gloves when de-skinning jalapeños. No gloves means severely stinging hands later! If you don't have gloves and have to use bare hands, I found that aloe vera gel gave me some relief. A hot shower made it 100x worse!!

Ingredients:
8 Klondike Rose red skin golden flesh potatoes, washed and scrubbed
olive oil, for frying and coating potatoes
kosher salt
1 250g package cream cheese, softened
2 jalapeño peppers
1/2 onion, chopped
1 tsp garlic, minced
1 tsp cayenne pepper
1 tsp paprika
1/2 tsp dried oregano
1/2 tsp dried thyme
1/4 cup mozzarella cheese, grated
1/4 cup cheddar cheese, grated
2 cooked bacon slices, crumbled
2 tbsp cream
about 1/4 cup Panko bread crumbs
1 green onion, chopped

Directions:
  1. Preheat oven to 400º
  2. Pierce potatoes several times with a fork. Rub potatoes with olive oil and sprinkle generously with kosher salt. Place potatoes directly on top rack of oven and bake for about 1 hour, or until potatoes are tender when inserted with a fork.
  3. Pierce jalapeños with wooden skewers that have been soaked in water for at least 30 minutes. Using a gas stove or BBQ, turn on flame and carefully place jalapeños directly on flame. Char jalapeños on all sides so that they are black and blistered. Remove skewers, place immediately in a glass bowl, and cover the top with plastic wrap. Let stand for 10 minutes. Wearing gloves, rub the jalapeños with your hands until all the skins are removed. Cut jalapeños in half and remove as much of the seeds and membrane to your liking (they are the spicy parts of the jalapeño, so use your discretion!). Chop finely.
  4. Warm 1 tbsp of olive oil in a small skillet at medium heat. Add the chopped onion and fry, stirring occasionally, until transparent. Add the jalapeños and continue to cook until softened and onions are golden.
  5. In a medium bowl, mix together the cream cheese with the jalapeños, garlic, cayenne pepper, paprika, oregano, and thyme. Mix in the mozzarella, cheddar, and bacon and set aside.
  6. Once the potatoes are baked and are cool enough to handle, slice off the top 1/4 of each potato. Using a small spoon, carefully scoop out the filling, leaving a 1/4-inch thick layer around the skin, and place insides in a medium bowl. Mash the potato insides with a potato masher or fork and stir in the cream. Mix in the cream cheese until well combined.
  7. Using a small spoon, carefully re-fill the potato skins evenly with the cream cheese and potato filling. Sprinkle the tops evenly with Panko bread crumbs and bake for 20-30 minutes, or until bread crumbs are golden. Top with green onions and serve immediately.
Listening To:
Florence & The Machine - No Light, No Light

Powered by mp3skull.com

Wednesday, May 30, 2012

The Land of Milk & Honey

Where do you even begin to retell some of the best ten days you've ever had in your life? The pressure's on with 47 new eyes awaiting the retelling of this incredible experience that we got to share together. I'm feeling that pressure not because I'm worried about judgment, let's face it, after ten days of spilling some of your deepest, darkest, and brightest secrets, memories, and desires, all the while creating a whole slew of new ones, all judgment has gone right out the window. No, the pressures on in my mind to represent this unforgettable experience with that same energy and magic that we all felt as we lived it, capturing the moments as precisely as possible so that maybe, just maybe, it can send us right back there, if only for a moment. 

After two weeks of adjusting back to reality here in Toronto, telling my friends and family all about the magical land of milk and honey and the amazing people I got to meet and learn from, I've come to realize that no matter how many stories you tell, how much details you give, how many photos you show, you really can't capture the way you felt as you experienced those special memories right there in that moment.  In fact, those memories that I can still see so vividly when I close my eyes, start to feel a little less real each time I share them.  Running down 140 slippery stone steps in Tzfat with a falafel in one hand, Israeli mango juice in the other, while trying not to trip on my floor-length, Tzfat-approved, modest dress to make it back in time for our tour; holding hands while dancing and singing on the Southern Steps of the Temple Mount surrounded by over 100 other Jewish Canadians celebrating Shabbat as the sun begins to set, the Western Wall just behind us, sending chills through out bodies; sleeping in the desert beneath a Bedouin tent surrounded by 47 new best friends, the smell of bonfire smoke and camels lingering in the air; bobbing around like buoys in the Dead Sea, the view of desert mountains behind us with Jordan straight ahead, running our hands down our arms and legs, feeling that slick and slippery dead sea water as it brushes our skin; feeling the lukewarm water from the Ein Gedi waterfall stream down our backs and through our sweat soaked hair, after just climbing down the snake path of Masada in 38 degree weather; on paper, you just can't do those memories justice. So instead of doing my usual, wordy blog post, going through my itinerary each day to share every last detail with you, I'm choosing to simply tell you a little bit about Birthright itself, seeing as many people are unfamiliar with the organization, share some photos, and, of course, fill you in on what I got to experience of the food culture in Israel.
First up, many of you are probably wondering what exactly is birthright? Taglit-Birthright is an organization that offers the gift of a free 10-day educational trip to Israel for Jewish adults between the ages of 18 to 26. This means Birthright covers your flights, accommodations, two meals a day, activities each day, a bus for all of your transportation during the trip, as well as hiring an educator to lead your trip, which I found priceless! Since its inception in 2000, Taglit-Birthright Israel has sent nearly 300,000 Jewish young adults to Israel. They come from nearly 54 countries, all 50 U.S. states and Canadian provinces, and from nearly 1,000 North American colleges and universities. The trip aims to strengthen participants Jewish identity; to build an understanding, friendship and lasting bond with the land and people of Israel; and to reinforce the solidarity of the Jewish people worldwide. Although there are many different trip organizers within Birthright, they all offer a very similar itinerary including: Israeli tour guides; 5 or 10 days spend with Israeli peers (mostly soldiers and students); tour of the Old City of Jerusalem and the Western Wall; tour of Massada and the Dead Sea; travel to other cities/towns like Tel Aviv, Haifa, Tsfat and Eilat; accommodation in three and four star hotels and kibbutz'; uniform safety and security procedures. What more could you ask for? (birthrightisrael.com)


Because I was on an organized trip, most of our meals were planned out for us, which meant a lot of big Middle Eastern buffets for breakfast and dinner.  Some were better than others, but they all had a very similar spread.
Thanks for the olive photos Shafir!
I had heard a lot about the breakfast buffets in Israel, so I was looking forward to checking our what all the hype was about.  I have to say, being non-kosher, I couldn't help but feel a little let down walking into a breakfast buffet and not smelling the enticing scent of bacon and sausages, but then again, the addition of delicious, super creamy and smooth Israeli hummus and tahini at each buffet made it worth it! Something that came as a surprise to me was the selection of raw vegetables and dressings that were present at each meal, including breakfast.  As many times as I tried, I could never really get into the whole vegetables for breakfast deal, but I enjoyed making a habit out of eating a boiled egg, cottage cheese, cheese slices, and toast each day. Speaking of cottage cheese, the yummy cheese is a staple for breakfast in Israel and tastes 50x better than any cottage cheese I have had in Canada, which I suppose is thanks to those notorious Israeli cows (which are known for producing more milk than any other cows). Cottage cheese is so popular in Israel that when Israeli's began noticing that the price of cottage cheese in Israel is even higher than any other parts of the world where Israeli cottage cheese is shipped, the citizens went on a cottage cheese boycott until the prices were lowered. Because Israel relies on the popularity of cottage cheese for their economy, the price was lowered in next to no time! Shakshuka is another Israeli breakfast item that I was looking forward to. Similar to my Italian-style Fried Egg with Tomato Sauce and Mozzarella, shakshuka is eggs that are baked in a tomato-based sauce with vegetables and Middle Eastern spices.
Amazing fresh passionfruit juice in Tzfat
On one of our final days of the trip we went to Neot Kedumim where we learned about the popular herb hyssop (the humble herb), which is ground to make za'atar, which is often sprinkled on pizza, pasta, and pita bread. One of the Israeli soldiers that I befriended on the trip, Tali, told me about the most popular way to eat za'atar, which is to dip warm pita bread in olive oil, then dip it into the za'atar, and voila, you have a delicious and simple appetizer! Tali was kind enough to give me her baggie of za'atar that we ground together so that I could experiment with it at home. Thanks Tali! Despite being extremely nervous carrying the marijuana-resembling herb through customs, I'm glad to have a little bit of Israel in my kitchen to cook with!

The olive press, grinding za'atar, and Golan Heights Winery
Another great foodie find that I was able to take home with me was Israeli olive oil. Our incredible educator, David, who led our trip was able to pull a few strings one day to fit in a visit to an olive press where we got to taste a selection of different olive oils that they press right there.  The selection included some oils that came from different types of olives (ie. black, green, and another type, which was the strongest in flavour), as well as a number of flavoured oils such as lemon, garlic, and chili pepper.  Their olive oil was so delicious and fragrant, I had to take a bottle home! Although we unfortunately didn't see much fruit at our buffets (we were still pretty early in the season for ripe produce) Israel is known for its abundance of figs, grapes, pomegranates, and dates as well as olives, barley, and wheat, which are known as The Seven Species.  The Seven Species are the seven types of fruits and grains named in the Torah as the main produce of the land of Israel.

Me (Danielle Rose) & some good friends!

Our last supper in Israel
If you follow me on Twitter or Facebook, you'll know that I was most looking forward to the falafels in Israel! It was only a few hours after we landed at Ben Gurion airport just outside of Tel Aviv that I experienced the most amazing falafel ever! None of the other falafels that I ate on the trip (and oh, there were A LOT) even compared to this falafel perfection.  First off, you need to understand that falafels in Israel are like a whole other animal.  Unlike the burrito-like falafels we enjoy here in Toronto, Israeli falafels are not wrapped.  The fresh and fluffy pita's (unlike Toronto's dry pita's) are simply cut in half, and stuffed with the falafel balls, and lots of fresh and delicious toppings and sauces. This particular falafel stood out because of its unbelievably fresh falafel balls.  Just behind the topping counter was something I had never seen before and have yet to see again, a falafel ball maker! The falafel ball maker consisted of a stainless steel vat containing the chickpea mixture, which, on command, would pop out a stream of the chickpea mixture for the cook to swiftly cut into balls, which would then drop directly into the hot oil to deep fry. These unbelievably fresh falafel balls were crisp on the outside, with a soft and fluffy interior, and loaded with lots of fresh flavours. To die for! It's interesting to note that a very popular falafel topping in Israel is actually french fries! I tried it one day and really liked it, although it made the street food even more filling than it is already. Although I've never been a big fan of shwarma, I knew that Israel would be able to turn me into a shwarma lover! The first couple of shwarma I ate were OK, but nothing to write home about. But it was on one of our last days that I got to eat the type of shwarma that I have always dreamt of. The meat was uber tender, moist, and flavourful turkey and I chose to wrap mine in laffa bread as opposed to pita, which is thicker, softer, and more flavourful. Loaded with lots of Israeli sour pickles, roasted eggplant, and amba (a spicy and savory mango condiment), this shwarma was fantastic!
My amazing shwarma
Our dinner at the Bedouin tents. Thanks for the photo Elena!
Because we were on such a strict schedule and would often only have 30-45 minutes on our own for lunch (which can fly by when you have 52 people waiting in lines) we would usually pick up some quick street food to quickly fill ourselves up.  Of course there were lots and lots of falafel and shwarma options, but one of my favourite street foods of the trip was actually pizza! Before exploring the Nachalat Binyamin Artist Market, two friends and I decided we had to eat something other than falafel, shwarma, and hummus, and found ourselves inside this quiet, little pizza place.  I've gotta say, I was definitely skeptical of the idea of Israeli pizza, but after taking a quick glance at the selection of pizzas they had in their display, I knew it wouldn't disappoint.  We all decided on the most unique pizza of the bunch, a thin crusted pizza topped with a bit of tomato sauce, tomato slices, eggplant, olives, green onions, and one lone bocconcini ball at the end of each slice. The veggies were all topped with a light grate of some sort of cheese that I wish I knew the name of! White and very salty, and not melted, just warmed until slightly softened on the pizza, this cheese was absolutely delicious and helped to make this pizza one of the best I've tasted! After the pizza we went to the Nachalat Binyamin Artist Market, which is an outdoor market filled with vendors selling lots of T-shirts, toys, games, accessories, novelty items, and my personal favourite, lots and lots of food! It was really cool to get to see all the different types of spices, olives, condiments, pastries, breads, and more that Israel has to offer. I felt like I was in foodie paradise, taking photos at every turn (that is until my camera died). 

The incredible pizza outside of Nachalat Binyamin Artist Market
The many delicacies at Nachalat Binyamin Artist Market
With a good portion of our trip spent on our tour bus, snacks were absolutely essential! Growing up with an Israeli friend as a child (hey Noa!), I was already looking forward to snacking on Bissli, a savory snack food that comes in all different flavours such as onion, grill, smokey, pizza, falafel, taco, and hamburger. Going into the grocery store to buy some Bissli, I found myself totally blown away, and quite frankly overwhelmed, by the abundant and unique array of snack foods and chocolates that are available in Israel. I was so taken by them that I actually brought my sister home a whole selection of some of the favourites, as well as bringing home my little cousins some special Israeli chocolate bars (that I now wish I had also bought for myself). Although there were so many delicious snacks and chocolates in Israel, the clear standout for everyone was a type of snack called Bamba. Bamba have the exact same texture and shape as cheese puffs, but are flavoured like peanut butter. When most people tried their first bite of Bamba, they seems unsure of they think: "Oh, that's different...I don't know if I like this..." (takes another bite) "...oh hmm...this is different...Do I like this?" (takes another bite) and before you know it, you've eaten the whole bag and are begging for more! Oh how I miss my Bissli and Bamba!
I feel so lucky to have been able to take part in such an incredible experience.  This trip was so much more than I ever thought it would be and I will never forget it! I want to send out a great big thank you to CIE Birthright, our amazing educator David, our wonderful leaders Courtney and Kyle, and our medic, security guard and good friend Ben for helping to make our trip as fantastic as it was. If you are eligible to participate in Birthright, I highly, highly recommend applying and taking part in this incredible opportunity yourself.

Listening To:
Diddy-Dirty Money - Coming Home (Feat. Skylar Grey)

Powered by mp3skull.com