Showing posts with label fish. Show all posts

Thursday, July 19, 2018

Fish Tacos with Ontario Corn Salsa

Summertime is the season for food festivals, and I don't think there's any other dish that I associate with food festivals more than a delicious fried fish taco! Some of the best fish tacos I've consumed have been in the summertime, with friends and loved ones, enjoying a Toronto food festival. While food festivals are less my jam these days (or maybe just the long lines and lack of shaded spaces for my poor fair skin), I still love to enjoy a great fish taco in the summer inspired by my festival-going days, but now I make my own! Combining crispy fried fish with one of my favourite summer flavours in Ontario, fresh corn, my fish tacos are a great balance of flavour and texture, and are perfect for a hot summer night!

The corn salsa is key in this recipe, providing that much-needed hit of sweetness, freshness, acidity, spice, and texture to counteract the heaviness of the fried fish. The sweetness is found in those sweet and juicy Ontario corn kernels (there's nothing like them, is there?!) that are really the star of this salsa, and maybe even the whole dish! To dress my fresh grilled corn I like to add a pop of freshness from cilantro and tomatoes, some acidity and heat thanks to pickled jalapeños and their pickling brine, as well as lime, chilli powder, and red onion.

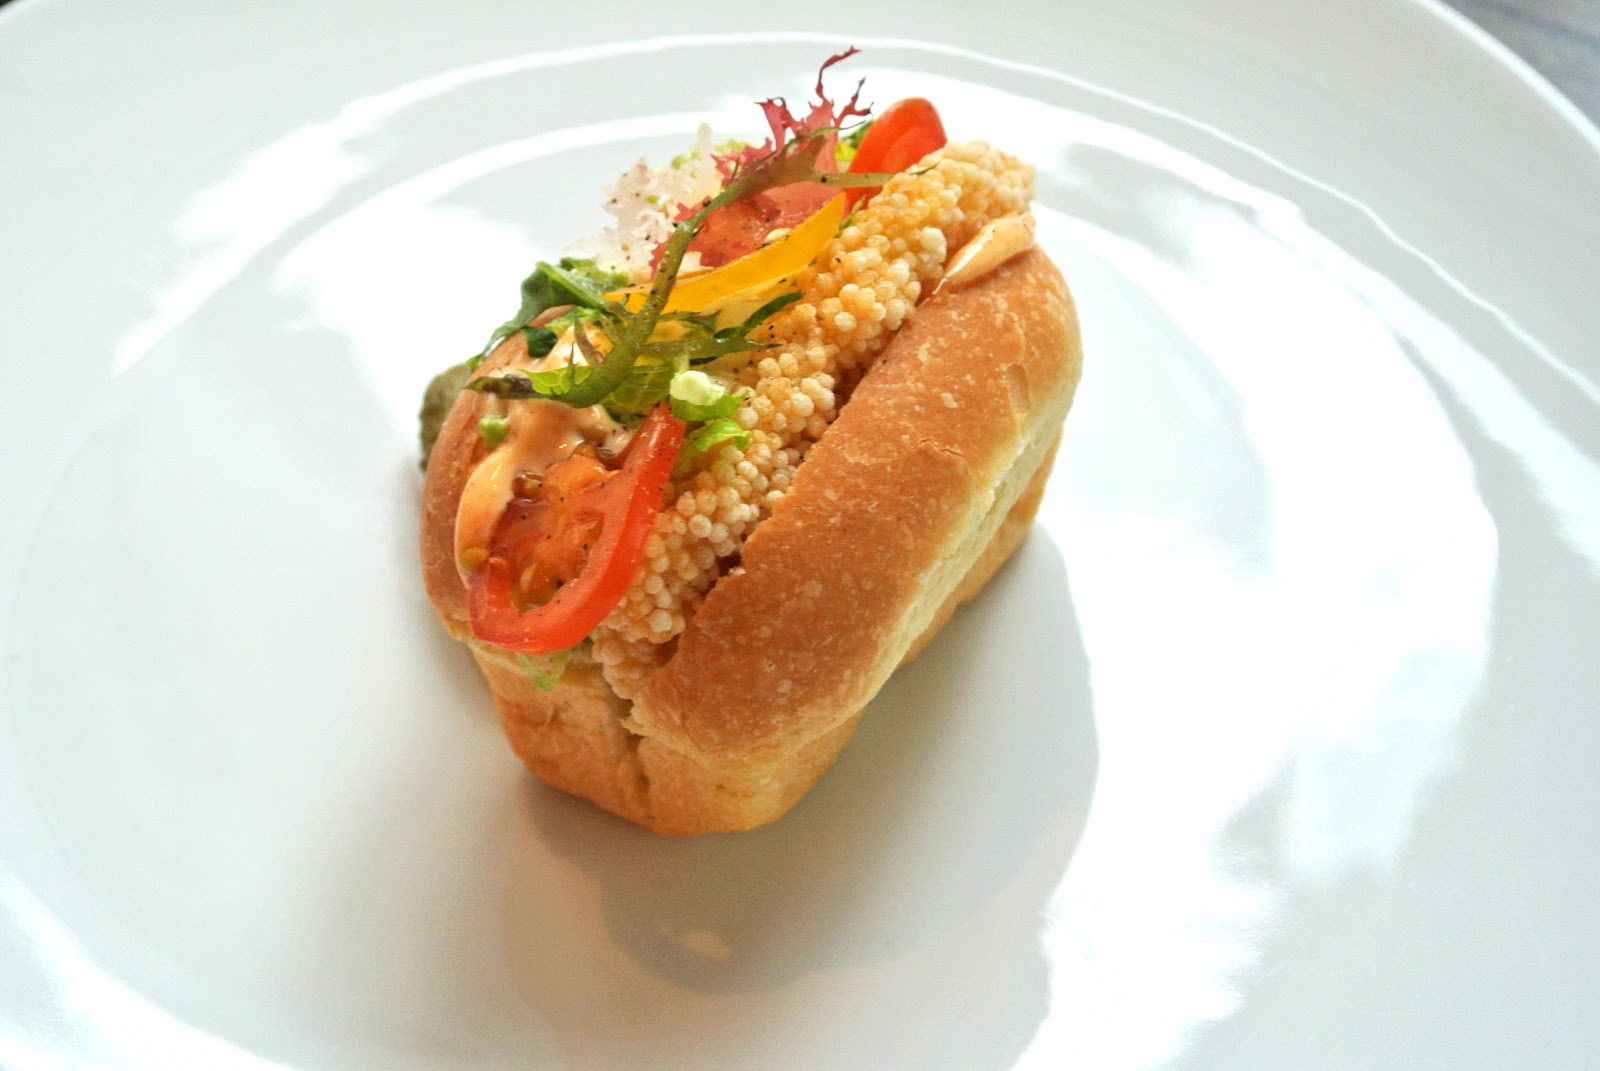
To balance out the rest of the flavours for our final taco, we turn to our toppings! Chipotle-Lime Aioli is a condiment that has become just as essential in my fridge as mustard and pickles, and it also works incredible in this taco to add a smokey and creamy element that ties the whole dish together. The remainder of the toppings can be adjusted based on your own personal preferences, but I enjoy the crunch from thinly sliced red cabbage, as well as lots of fresh cilantro, and of course hot sauce!

Make your corn salsa in advance to speed this dish up. Your tacos will come together so quickly you can even make them on a weeknight to give yourself a special mid-week treat! I hope you enjoy them as much as Chris and I did!

Ingredients:
For the Ontario Corn Salsa
3 ears Ontario corn, husks and silks removed
1/4 - 1/2 cup pickled jalapeños, finely chopped (adjust the amount depending on the level of heat you prefer)
1 Tbsp pickling brine from pickled jalapeños
juice from 3/4 of a medium lime
1/4 cup red onion
1 small tomato, small dice
1/2 tsp chilli powder
light drizzle of olive oil
salt and pepper, to taste

For the Fried Fish
1 1/2 cups cake flour
1 1/2 Tbsp paprika
1/2 Tbsp chilli powder
2 tsp black pepper
1/2 tsp kosher salt
kosher salt
3/4 cup beer (lager works great!)
1 large egg
peanut oil, for frying 
1 lb cod, cut into 8 even pieces (may substitute other white fish)

To Dress Your Tacos
6-8 corn tortillas
Metro Irresistibles Chipotle-Lime Aioli
fresh cilantro
red cabbage, thinly sliced
hot sauce

Directions:
Ontario Corn Salsa
  1. Preheat BBQ or grill pan and lightly oil. Place corn directly on grill and cook about 2 min per side. Cool.
  2. Cut corn niblets from cob and place in a medium bowl. Reserve your corn cobs for another use (how about making corn broth for a chowder!).
  3. Add pickled jalapeños and pickling brine, lime juice, red onion, tomato, chilli powder, and a drizzle of olive oil. Taste and season with salt and pepper, as needed. Cover and transfer to fridge until ready to dress tacos.
Fried Fish
  1. In a medium bowl, combine cake flour, paprika, chilli powder, black pepper, and kosher salt. Transfer half of the mixture to a large bowl.
  2. Add the beer and egg to the mixture in the large bowl, and whisk until smooth.
  3. In a large pot (I used a dutch oven) or wok, add peanut oil so it reaches 1/2 to 3/4 of the way up the pot. Heat oil to 350ºF. Preheat oven or toaster oven to 250ºF, and line 2 baking sheets with paper towel and a wire rack. Place one in the oven or toaster oven and the other at the stove.
  4. Place all of the fish pieces in the large bowl with the beer batter and stir to coat.
  5. Working one at a time, pick up a piece of fish and allow any excess batter to drain off. Place into the medium bowl with the dry mixture, and toss to lightly coat. Carefully place in the hot oil (letting the fish fall away from you) and fry until evenly golden, about 3-4 minutes. Place on the stovetop wire rack to drain, and lightly salt. Transfer to the prepared pan in the oven to keep warm. Continue with remaining fish, making sure to not crowd the oil.*
* I like to work with two pieces of fish frying in the oil at a time. Crowding the oil will drop the temperature, resulting in an oily batter.

Assembly
  1. To assemble your tacos, heat tortillas (one at a time) for 1-2 min per side in a medium pan at high heat. 
  2. Squeeze about 1-2 Tbsp Irresistibles Chipotle-Lime Aioli on top of tortilla, and top with fried fish, corn salsa, cilantro, cabbage, and hot sauce. Enjoy!
This post was created in partnership with Metro Ontario. 

Listening To:
Let's Eat Grandma - Falling Into Me

Wednesday, February 12, 2014

Baked Coconut Shrimp

When your city turns into a snow globe and you have the day off work and school, there's not a chance you're going to go out grocery shopping! It was one of those nights where you scour the fridge and pantry for any possible collection of ingredients that could somehow turn into a satisfying meal, allowing you to forget about your inevitable messy commute come the following morning. When I failed to find any leftovers or raw ingredients in the fridge that I could magically whip into something, I immediately turned to my good ol' standby frozen, raw shrimp. There is never a time when my freezer does not contain at least one bag of frozen, raw shrimp so that on nights such as this, I don't have to reluctantly open a box of macaroni and florescent orange cheese powder to sustain me for the evening. With recent dreams of beaches, sand, and coconuts floating through my red head, I couldn't help but be drawn to the bag of unsweetened shredded coconut in the freezer, just begging to be used as a crispy coating for my frozen shrimp. 

I tend to turn my kitchen into a disaster zone whenever there is any type of breading involved, so I expected this evenings dinner of coconut shrimp to be no exception, especially considering this was my first go at making the sweet and savory delight. Thankfully the coconut shrimp production line proved to be far more tidy than the spaetzle and veal scallopini tornado of 2014, and in less than 10-minutes, my little shrimps were coated in a mixture of toasted coconut and panko breadcrumbs and baking in the oven. When a new dish goes as smoothly as that, I can't help but assume it's going to be a bit of a failure come that first bite, but my baked coconut shrimp was an absolute gold medal winner in my books! A little pre-toast of the coconut and panko breadcrumbs in a dry pan proved to be beneficial, giving the shrimp coating a wonderful crunchy texture, and enhancing the nutty flavour of the coconut. It's that great crispy texture that surprised me and made me wonder why I was ever bothering to purchase pre-made frozen coconut shrimp in the past, which had always left me unsatisfied, disappointed in the flimsy, almost-soggy texture that they would always come out as. With such wonderful flavour, texture, and ease of production I will absolutely be adding this recipe to my "Danielle's Favourites" section of the blog. Now excuse me while I slip back into my dream of sun, sand, and coconuts. 

Ingredients:
1 Ib raw shrimp (fresh or thawed from frozen), peeled, deveined, & patted dry with a paper towel
salt, to season
1/2 cup unsweetened shredded coconut
1/2 cup panko breadcrumbs
3 tbsp flour
1 egg, beaten
oil for baking pan
spicy dipping sauce, for serving (I like to use a Thai dipping sauce)

Directions:
  1. Preheat oven to 425º.
  2. In a medium pan, add the coconut and panko breadcrumbs and toast at medium heat until golden. Keep a close eye on the pan as they will go from golden to burnt very quickly! Spoon into a small bowl immediately to prevent further browning. Add a pinch of salt to the mixture.
  3. Lightly sprinkle a pinch or two of salt over the shrimp to season. 
  4. Pour the flour and beaten egg into two separate small bowls. Lightly spray or rub a medium-large baking sheet with olive oil or coconut oil. Line up your station so you have first your shrimp, then the bowl of flour, then the bowl of beaten egg, then the bowl of coconut and panko, then your baking sheet, all in a line.
  5. Dip a shrimp into the flour to coat evenly, lightly shaking off any excess. Dip the flour dusted shrimp into the egg mixture to coat, then into the coconut and panko mixture, pressing to coat. Place the coated shrimp onto the baking sheet. Repeat with remaining shrimp. 
  6. Bake for 10 minutes. Flip shrimp using tongs, and bake for an additional 6-7 minutes. Serve immediately with spicy dipping sauce. 

Listening To:
Beyoncé - XO

Thursday, June 27, 2013

Crab-Stuffed Portobello Mushroom Caps Featuring Spicy Hidden Valley Ranch

I've put it on my salads, I've used it as a dip for vegetables, but I had no idea just how versatile ranch dressing truly is until Hidden Valley Ranch sent me a trio of their ranch dressings, encouraging me to experiment in any way I pleased. Let me tell you, with that much freedom, I couldn't help but want to squirt a little ranch dressing into just about everything I was making! The wheels started turning as I started fantasizing about Hidden Valley Ranch featured in quiches, whites sauces for both pastas and pizzas, cannelloni fillings, tzatziki sauce, in the cheesy jalapeno popper filling, basically just about anything you could ever imagine, I had thought of. My dining room table became covered in torn pieces of scrap paper, covered with constellations of my scribbled notes and research. With all of those exciting ideas, some of which never got further than those scribbled notes, it was difficult to decide what recipe I wanted to submit to them. I had to narrow it down. I knew that I wanted my recipe to be something unique and semi-upscale, something you would want to serve at a dinner party. I also knew that I wanted my recipe to include a number of vegetables so that it would encourage what Hidden Valley Ranch tries to promote with their dressings, which is "eat your vegetables!". 

After much play in the kitchen (just another word for recipe testing) I finally chose to submit my recipe for Crab-Stuffed Portobello Mushroom Caps Featuring Spicy Hidden Valley Ranch. These stuffed portobello caps are like the bite-sized version that most people are familiar with, but made much more substantial and appropriate to serve at a dinner party thanks to their large and striking size. I liked the meaty texture and flavour of the portobellos, contrasted against the creamy crab and cream cheese filling. Because much more filling can fit inside of a portobello cap as opposed to a button or cremini mushroom cap, I wanted to add something that would give the filling a bit more texture and an extra hit of flavour. Sweet red bell peppers were the perfect solution, and an easy way to add more veggies into the dish. The Spicy Hidden Valley Ranch adds a zesty hit of flavour to the filling, with just a hint of spice that is also reflected in the crunchy panko breadcrumb topping. Serve the Crab-Stuffed Portobello Mushroom Caps atop lightly dressed (a simple balsamic vinaigrette would work perfect) mixed greens to make this a delicious main for your dinner party, or even a special lunch! 

Thank you to Hidden Valley Ranch for giving me the opportunity to have fun and play in the kitchen! 

*Remove the gills from the Portobello mushroom using the tip of the back of a spoon.

Ingredients:
7 Portobello mushrooms, stems removed and reserved, gills removed*
1 tbsp butter
1/2 medium onion, finely chopped
1 garlic clove, minced
1/2 red bell pepper, finely chopped
1/2 cup cream cheese
1 cup lump crab meat
1/3 cup Hidden Valley Ranch Spicy
1/4 flat leaf parsley, finely chopped
1/2 tsp salt
1/8 tsp pepper
1/2 cup Panko breadcrumbs
1/4 tsp cayenne pepper

Directions:
  1. Preheat oven to 375º.
  2. Finely chop reserved Portobello mushroom stems.
  3. In a medium skillet, melt butter over medium heat. Add garlic and onion and sauté for 2 minutes. Add the chopped mushroom stems and red bell pepper and cook until softened. Set aside
  4. In the bowl of an electric mixer, whip cream cheese (using the paddle attachment) until light and fluffy. Add the mushroom and bell pepper mixture, crabmeat, Hidden Valley Ranch Spicy, parsley, 1/4 tsp salt, and pepper and stir to combine.
  5. Lightly score the top of the mushrooms and place on a lightly oiled baking sheet.
  6. Spoon crab mixture into mushrooms evenly.
  7. In a small bowl, stir together the Panko breadcrumbs, 1/4 tsp salt, and cayenne pepper. Evenly top the filled mushrooms with the breadcrumb mixture.
  8. Bake for 20 minutes. Serve immediately. 
Listening To:
Modest Mouse - Float On

Powered by mp3skull.com

Thursday, May 2, 2013

VOTE! DFC Creamy Seafood Challenge: Creamy Clam & Vegetable Chowder

Last year I had the opportunity to work with the Dairy Farmers of Canada on their Anyday Magic Cream Challenge, submitting a recipe for a Fresh Mixed Mushroom Mac & Cheese that was absolutely delightful. Having such a great time collaborating with them last year, I jumped at the opportunity to participate in their 2013 cream challenge! Unlike last year where bloggers were asked to recreate classic dishes with a healthy twist, this year we were each given a theme in which we had the freedom to create anything we wanted! I was lucky enough to grab a spot in one of the most coveted themes this year, The Creamy Seafood Challenge. 

After having such an incredible time at the Ocean Wise Chowder Chowdown this past November, getting to try over a dozen seafood chowders from some of the best chefs in Toronto, I was inspired to create a chowder of my own. I used the classic creamy New England clam chowder as my base, but amped it up with big flavours that inspired me from the Chowder Chowdown, and an abundance of vegetables for a hearty texture. I was so incredibly proud of how my Creamy Clam & Vegetable Chowder turned out, immediately downing a giant bowl after snapping some photos, and proceeding to brag about my awesome recipe to all my friends and family ever since! This is one recipe that you have got to try!

Check it out and please VOTE for my recipe for a chance to win the ultimate blender! 

Listening To:
T. Rex - Mambo Sun

Powered by mp3skull.com

Monday, February 4, 2013

Ocean Wise Month Media Launch: Experience It For Yourself!

If you had a chance to catch my entry in November on the Ocean Wise Month Media Launch held at Mildred's Temple Kitchen, you what an enjoyable experience that was for me being able to learn about the importance of Ocean Wise, how to take part in the movement of sustainable fishing and consuming, and learning how to create delicious and striking Ocean Wise approved dishes in my own home. Of course sampling delicious Ocean Wise seafood was my favourite part of the event, but my second favourite part was watching the three chef demos presented by Neptuno Oysters, Hooked Inc., and Chef Taylor McMeekin of the ACC and formerly of Mildred's Temple Kitchen. I loved getting to learn how to shuck oysters, steam fish en papillote, and basket a fish, three techniques formerly foreign to me, as well as hear their own personal feelings and experiences with sustainable seafood in Canada. Thanks to Ocean Wise, you can now share that same experience, by watching all three demos right here! I hope you enjoy it as much as I did! 

Listening To:
Kendrick Lamar - Money Trees (Feat. Jay Rock)

Powered by mp3skull.com

Tuesday, November 20, 2012

Ocean Wise Month Media Launch

Two weeks ago I had the pleasure of attending the Ocean Wise Month Media Launch at Mildred's Temple Kitchen. Ocean Wise has declared November as Ocean Wise Month, a month dedicated to drawing awareness to the many sustainable seafood varieties we are so lucky to have access to in Canada. Ocean Wise is a Vancouver Aquarium conservation program created to educate and empower consumers about the issues surrounding sustainable seafood. I first learned about Ocean Wise at their Tides of Change event this past Spring, and was immediately struck by their cause. The past event was so well executed and so informative, I knew I couldn't miss out on the Ocean Wise Month Media Launch. 
The Media Launch drew attention to the biggest threat facing our waters today, overfishing. Through culinary demonstrations, three top Ontario seafood chefs shared their experiences on seeking out and obtaining sustainable seafood for their business, how the seafood landscape has changed over the years due to overfishing, and how we, as consumers, can make the right choices when purchasing and ordering seafood. 
The event began with a demonstration by Chef Lirad Kligman of Neptuno Oysters on how to properly and safely shuck an oyster. He told us all about how Neptuno obtains their oysters and the many health benefits of eating oysters, which include its high levels of zinc. He prepared an oyster amuse bouch with umi mousse and chives as well as one of my favourites of the day, Kumamato Oysters with Arctic Kiwi Jam. The Kumamato Oysters with Arctic Kiwi Jam blew me away with it's sweet and savory combo, and the unexpected burst of flavour from the kiwi. Chef Kligman was kind enough to provide his recipe for the arctic kiwi jam so that we can recreate this striking dish at home! 
Chef Lirad Kligman using his Dexter knife to demonstrate how to properly shuck an oyster
Oyster Amuse Bouch 
uni mousse & chives
Kumamato Oyster with Arctic Kiwi Jam
Recipe for Arctic Kiwi Jam
Ingredients:
1 pint arctic kiwi
2 cups gewurztraminer 
3 cups sugar

Directions:
  • Reduce wine by half.
  • Add sugar, stir until dissolved
  • Add kiwi (skin on, whole) and lower heat.
  • Once kiwis begin to burst, remove from heat and cool.
Suggested Cocktail Pairing
Caesar made with house-made Ocean Wise Clamato juice
Next up was Chef Kristin Donovan of Hooked Inc., who told us about the advantages of Great Lake fishing and how lucky we are as Canadians to have access to Great Lake fish. One of the problems with Great Lake fish is that the American market walks away with a big chunk of it, making it difficult for Canadian retailers and business' to get their hands on this fantastic sustainable resource. Chef Donovan told us about how her and her business partner and husband Dan Donovan fought to acquire some of the best quality Great Lake fish to sell and serve at Hooked Inc. 

Chef Donovan demonstrated one of her favourite ways to cook fresh fish, making Lake Erie Walleye on Papillote. Papillote is a method of cooking which allows the subtlety of fresh fish to shine by steaming the fish with herbs and vegetables in individual parchment paper packets. The papillote method not only helps deliver in terms of flavour, but also helps to create a memorable dining experience. Chef Donovan told us about how special it is to serve fish on papillote at dinner parties, encouraging each diner to cut into their individual fish package right at the table, allowing the aromas to burst out of the paper and dance around the dining room. Although it may appear complicated, it's actually quite simple to prepare, and is a great option for entertaining, as you can prepare everything in advance and simply pop in the oven when ready to serve. 
Chef Kristin Donovan demonstating how to cook fish using the papillote method
Lake Erie Walleye on Papillote 
Suggested wine pairing: Mission Hill Winery Sauvignon Blanc
Smoked Ontario Lake Whitefish Rillettes
crostini with heirloom pickled beets & wild arugula
Suggested wine pairing: Mission Hill Winery Sauvignon Blanc
The show-stopper of the day had to be from Chef Taylor McMeekin, former chef at Mildred's Temple Kitchen and current chef du cuisine at Air Canada Club, Maple Leaf Sports & Entertainment. Chef McMeekin demonstrated his fine knife skills by showing attendees how to basket one of his favourite sustainable fish, rainbow trout. Chef McMeekin fondly recalled memories of his childhood, fishing for rainbow trout with his father, and told us about how the seafood landscape in Canada has changed drastically over the years. 
"We're at a critical point where, if we blindly continue our current seafood harvesting and consumption patterns, we will start seeing entire species disappear in our oceans, much like we did in earlier decades in the Great Lakes...Compared to even a few short decades ago, fisheries in the Great Lakes region have recovered to a great degree, and are much healthier than before, which means there are sustainable seafood options right here in Ontario. It's time to re-evaluate our go-to seafood choices." - Chef Taylor McMeekin
Both Chef McMeekin's Stuffed Rainbow Trout with wild rice and fennel sausage as well as his Cold Smoked Trout with ginger glaze, matsu apple, and soy emulsion were definitely the standouts of the day, which says a lot considering the high quality of food that was being served by all three chefs. Both dishes were right on par with contrasting flavours and textures, as well as a beautiful presentation that had all attendees snapping up photos left, right, and centre. Chef McMeekin was kind enough to provide us with his delicious recipe for his Stuffed Rainbow Trout to wow guests at home.
 Chef Taylor McMeekin demonstrating his knife skills on this fresh rainbow trout
Stuffed Rainbow Trout
wild rice & fennel sausage
Suggested wine pairing: Mission Hill Winery Chardonnay
The beautifully plated stuffed rainbow trout
Chef Taylor McMeekin's Stuffed Rainbow Trout
Prep Time: 25 minutes
Cook Time: 15 minutes
Ingredients:
1 rainbow trout
700 grams diced leek
100 grams wild rice
200 grams Italian sausage
10 grams sliced east west garlic
2 grams fennel pollen
1 sprig fresh thyme
kosher salt to taste

Directions:
  • Blanch leek greens for 30 seconds and place in an ice bath.
  • Simmer wild rice until puffed.
  • Remove spine and ribcage of trout through back leaving belly intact.
  • Uncase and brown sausage.
  • Dice Leek and and garlic, add to sausage.
  • Add thyme and wild rice.
  • Continue on low heat for 5 minutes.
  • Remove and Cool.
  • Once cool, stuff trout with the cooled mixture and tie with blanched leeks greens.
  • Season with fennel pollen and salt.
  • Bake for 15 minutes at 425ºC.
Cold Smoked Trout
wild ginger glaze, matsu apple & soy emulsion
 Suggested wine pairing: Mission Hill Winery Chardonnay

This whole event was a precursor to the Vancouver Aquarium Ocean Wise 2012 Chowder Chowdown competition, which is being held tomorrow, November 21st, at the Fairmont Royal York. Attendees will have the chance to savour a dozen original, ocean-friendly chowders, paired with craft beers, and vote for their favourite. Tickets are still available to the public here! I hope to see you there!
Remember to look for the Ocean Wise symbol when purchasing and ordering seafood! The Ocean Wise symbol next to a seafood item is the Vancouver Aquarium's assurance of an ocean-friendly seafood choice. 

Listening To:
Hot Chip - Motion Sickness

Powered by mp3skull.com

Wednesday, June 13, 2012

Ocean Wise: Tides of Change

Before fleeing off on my Israeli adventure, I had the opportunity to attend Ocean Wise: Tides of Change, an event held by the Vancouver Aquarium Conservation Program to raise awareness on how Canadian chefs are reshaping the culinary scene using Ocean Wise choices. The event, which was held at Luma, a new addition to the group of about 50 Ocean Wise partners in Toronto, emphasized the need to make ocean-friendly choices for the health of our oceans. With depleting seafood stocks becoming a critical issue (an estimated 90% of all large, predatory fish are gone from the world's oceans), and consumer interest in sustainable seafood, there was no better time for concerned industry representatives, including celebrated chefs Martin Kouprie, Dan Donovan, and Brad Long, writer and sommelier Jamie Drummond, and sustainable seafood advocate Rebecca LeHeup to form the Ocean Wise Advisory Team in Toronto - A team charged with examining the local culinary marketplace and uncovering ways to further engage and educate consumers on the issues surrounding our oceans.
The event highlighted the important work that the Advisory Team is responsible for, as well as informing guests about the many sustainable seafood options that are available to us, and of course what unsustainable seafood we should stay away from. We were introduced to both familiar and unfamiliar sustainable seafood options that stretch across Canada through a delicious and striking tasting menu created by Luma's Executive Chef Jason Bangerter. Taking us across Canada, Chef Bangerter allowed us to taste two different types of fish from each region of Canada through his artfully plated savory seafood creations. Each dish was absolutely delicious, truly showcasing the fresh Canadian fish as the star of each dish, while representing it in a unique and visually appealing way.
Fried Lingcod Po-Boy
seaweed, spicy mayonnaise
Spot Prawn Tartare
chili, mint, coriander
Warm Glazed Mussels
ramp leaves, beech mushroom, béarnaise
Salt Cured Arctic Char
citrus, ginger, basil
Poached Trout Salad
peas, herbs, pickles
Smoked White Fish Fritters
wild leek, daisy caper rémoulade
To learn more about Ocean Wise and sustainable fish in Canada, check out the Ocean Wise website!

Listening To:
Robyn - Dancing On My Own

Powered by mp3skull.com

Wednesday, January 25, 2012

Simply Asia's® Soy Ginger Shrimp & Noodles

Simply Asia® - Real Asian. Real Fast.
The Chinese New Year is upon us and rather than heading out to a Chinese restaurant to celebrate like I have in previous years, this year I'm taking the wok into my own hands and cooking up some delicious authentic Asian recipes right at home thanks to Thai Kitchen® and Simply Asia®! I always used to look forward to braving the cold with my family and friends to trek down to Spadina to stuff our faces at our favourite Chinese restaurant (Kom Jug Yuen anyone? A total dive, but it's tasty and super cheap!), but over the years I have come to realize just how awful the meal makes me feel after consumption. Time and time again I would always end up curled up on the couch, arms clutching my stomach, regretting every piece of barbecued pork I just downed. So this year when I received an email from Thai Kitchen® and Simply Asia® offering to send me some of their products to check out for the new year, I decided to nix the greasy restaurants and create my own Asian meals at home all week long.

Although I absolutely love exotic foods and flavours, in the past I have always been intimidated about preparing foreign dishes because I was simply unfamiliar with a lot of flavours and techniques found in different cuisines such as Asian, not to mention the array of different dishes within each country in the continent. Thai Kitchen® and Simply Asia® offers a fantastic introduction to Asian cuisine as all of their products feature authentic Asian flavours using premium ingredients (no artificial flavours/colours/preservatives). I began my foray into Asian cooking with Simply Asia's® recipe for Soy Ginger Shrimp and Noodles using their Soy Ginger Noodles and Sauce pack. This was the perfect starting point for me as the product is basically a meal in a box (and I ain't talkin' about no Kraft Dinner!), with each box including a carb (noodles or jasmine rice), a sauce, and a topping, with vegetable and protein suggestions listed on the back. Simply Asia's® dinner packs are awesome because they allow you to get a sense of the different flavours and ingredients that go into each Asian dish, while still giving you the freedom of adding your own veggies and protein, and best of all they are wildly easy and quick to prepare! My mom and I both loved and devoured the tasty and flavourful dish, going back for not seconds, but thirds! I can't tell you how many times my mom proclaimed "this is so GREAT!" between bites, even jotting the name down on her grocery list to pick up more to give to my sister! Despite how much of the meal I ate that evening, my stomach felt totally fine all night, which came as no surprise to me because I was able to actually control what was going into my meal. Now that I've given one of Simply Asia's® 10-minute dinner packs a try, I feel ready to take the next step and try out Thai Kitchen's® recipe for Easy Chicken Pad Thai using their brand of Stir-Fry Noodles and Original Pad Thai Sauce. My mouth is watering just thinking about it, so it's time to sign off and get cooking! Review to come!

Why I Love Simply Asia's® Soy Ginger Noodles & Sauce:
It allows you to gain the confidence to create your own asian meals from scratch, and gives you a wonderful and delicious time-saving option for busy mid-week evenings!

Tip: Heighten the flavours even more by using Asian Cooking Oil (I used Spectrum's Organic Asian Cooking Oil) and grating in extra ginger!

Ingredients:
1 package Simply Asia® Soy Ginger Noodles & Sauce
1 tbsp oil (see tip!)
2 cups assorted vegetables, such as snow peas and red bell pepper strips
1 pound medium shrimp, peeled and deveined
pinch ground white pepper (I didn't have white pepper so I used black)
1 tsp sugar

Directions:
1. Cook noodles as directed on package, omitting salt. Drain and rinse with cold water.

2. Heat oil in large nonstick skillet or wok on high heat. Add vegetables; stir-fry 2 minutes. Add shrimp and white pepper; stir fry 1 minute.

3. Stir in sauce and sugar. Reduce heat to medium. Add noodles; toss to coat well and cook until heated through. Sprinkle with topping and serve immediately.

Listening To:

Monday, August 8, 2011

Tangy Lemon Halibut

Lately, as you may have noticed from my lack of recipe posting, I've fallen into a bit of a dinner routine rut. The dinner routine rut is when you find yourself going through a rotation of the same or very similar meals each week. You rotate between beef, chicken, fish, pork, pasta, repeat, reaching for the same rubs, spices, seasonings, preparing everything in such a familiar way that you could very well make the entire meal with your eyes closed. It's at this point that the total lack of inspiration kicks in and you are officially deep within the dinner routine rut, and once you're in, it's mighty hard to fight your way back out again. Because food plays such a significant role in my life, when I find myself in the dinner routine rut everything else in my life seems to suffer along with it. Thankfully I am now aware of the role that food plays in my life, and in an effort to better my life and personal well being, I can now use food and the motivation that arrises from being inspired and excited about food to direct other aspects of my life in a positive direction.

It's easy to pull yourself out of the dinner routine rut once you know you're in it, all it takes is a step in an unfamiliar direction. Try a preparation you're unfamiliar with. Pull out a spice you've never used before. Close your eyes, open your fridge and touch three things, now turn those three things into a meal. The point is to challenge yourself, even if it's just a little bit. This week, to pull myself out of the dinner routine rut, I went outside of my own familiar repertoire of dinner recipes and picked up halibut steaks (something I have only cooked once before) instead of the salmon that always seems to be in my grocery cart. Sure it's a little step, but it one that completely pulled me out of the rut! I got excited about working with this new ingredient that I had hardly played with before, and in turn, I've been feeling that same excitement in everything that I've cooked with all week long, pushing me to go outside of my boundaries. Instead of looking up a recipe for halibut I followed my instincts, choosing simple, fresh flavours to simply enhance the natural flavours of the fish. A citrus marinade and sauce with just a touch of fresh dill was all the halibut needed to reach spectacular heights. I absolutely loved how the halibut turned down, as did my family! With such a simple preparation and such wonderful flavours, there's no doubt I will be making my Tangy Lemon Halibut again and again...I just hope its recurrence doesn't lead to yet another dinner routine rut!

Ingredients:
2 halibut steaks
zest from 1 1/2 lemons
juice from 2 lemons
1/2 cup olive oil
2 tsp sugar
1/2 tsp paprika
1 tsp cold butter
salt and pepper, to season
1 tbsp dill, chopped

Directions:
1. Place the halibut steaks in a shallow dish. Set aside.

2. In a small bowl mix together the zest from 1 lemon, juice from 1 lemon, 1 tsp sugar, 1/4 cup olive oil, paprika, and a bit of salt to season. Pour over the halibut steaks and marinate for 15 minutes to an hour in the fridge.

3. While halibut is marinating, make the sauce. In a small saucepan, mix together the remaining lemon zest, lemon juice, sugar, and a bit of salt. Turn heat to low and cook until mixture starts to bubble around the edges of the pan. Add the butter and stir. Remove from heat and set aside.

4. Barbecue halibut on an oiled grill for about 5 minutes on each side, or until fish flakes easily with a fork. Do not overcook. Serve with pan sauce overtop, season with salt and pepper, and garnish with dill.

Listening To:
Kanye West & Jay-z - No Church in the Wild (feat. Frank Ocean)

Powered by mp3skull.com

Wednesday, July 6, 2011

Barbecued Garlic Shrimp

There are two types of people in this world, those that have the strength to deny cravings and those that give into them with abandon. I, my friends am the latter. No matter if it's bad for my health, expensive, or I have no easy way of accessing what I want, I will do everything within my power to satisfy that craving. So when that crazy brain of mine started chanting "Garlic shrimp! Garlic shrimp! Garlic shrimp" over and over again, I knew I had no choice but to submit to my craving. Luckily this time around I had my mind set on something that was not only healthy, but quick, easy, and ohhh sooo good!
Within only a matter of minutes after telling my dad last Tuesday that all I wanted in the whole wide world at that very moment was some delicious garlic shrimp, he had the grill fired up, and I was whisking away at my garlic marinade. In no time at all we had delicious garlic shrimp, hot off the grill, and ready to devour al fresco on our back porch. My barbecued garlic shrimp was so delicious, I made them again only three days later for our big family Canada Day barbecue! What a hit!

Ingredients:
1 pound shrimp, peeled and deveined
4 tbsp olive oil
4 garlic cloves, minced or pureed
1 tbsp red pepper flakes
1 tsp paprika
2 tbsp lemon juice
salt and pepper
1 tbsp parsley, chopped

Directions:
1. In a small mixing bowl, whisk together the olive oil, garlic, red pepper flakes, paprika, lemon juice, and salt and pepper.

2. Skewer the shrimp onto shish kabob skewers that have been soaked in water for about 1 hour. I like to place a skewer on each end of the shrimp for the most control when grilling.

3. In a shallow dish, lay out the shrimp on skewers and pour over the marinade. Let stand in the fridge for 10-15 minutes. Do not marinade shrimp any longer or else the marinade will begin to cook the shrimp.

4. Lay out shrimp onto grill set at medium-high heat. Grill shrimp for about 2-3 minutes on one side, then another 1-2 minutes on the other, or until shrimp are opaque. Do not overcook! Transfer to a serving dish and sprinkle with parsley. Serve with lemon slices.

Listening To:
Arcade Fire - Sprawl II (Mountains Beyond Mountains)

Powered by mp3skull.com

Saturday, March 12, 2011

Scallops with Bacon in a White Wine Sauce

If you read my previous post you'll understand a bit about where my heads been at lately. I apologize if I seem to post these "I'm in a weird funk" kind of posts fairly often, but in all honesty, this is more than just a food blog to me, but a form of expression, almost like a cryptic little diary that I can use to vent about whatever is on my mind. If you know me personally, you may know that I have gotten in a little bit of trouble in the past venting about my personal triumphs or woes in public on the internet, a mistake that I do not wish to repeat. So I now choose to play it safe and express myself through cooking, baking, photography, graphic editing, and creative writing. Although no, I'm not always directly stating what's on my mind, but my blog allows for me to express just enough to get it off my chest and feel relief, while still respecting my privacy. I have had a number of readers express to me that they would like to learn more about who I am outside of Ginger Rose, and although I may be timid to do so at first, little by little I want to start letting you in more. Although yes, I will be injecting my entries with a bit more about me, including more photos and personal stories, there are still many things that I feel the need to express, yet I don't believe my blog is the appropriate place. I recently started a Tumblr account called Ginger Rose Expressions to use as another avenue for expression. With photos, audio, and video that I find inspirational or reflect what I'm feeling as well as my personal experiments in photography, editing, and maybe even creative writing in the future, my Tumblr page will go beyond food to take you a bit deeper into my world. If you're interested in learning more about me, I welcome you to check out my Tumblr Ginger Rose Expressions, where I will be posting daily.

In my previous entry I also stated that I want to start cooking and baking more, and begin taking more risks with my cooking. Until know, other than the occasional burst of confidence, I have been pretty safe with my cooking, because, quite frankly, I was still new to it. Although I've had a food blog for two years now (Monday will be my two-year blogiversary!) I have to admit that I don't think I took in as much as I could have in those two years. I was certainly not cooking as much as I should have been, which meant that I didn't learn near as much as I believe I should have. Always timid and a bit scared of the unfamiliar, you may notice that I often stayed away from cooking many meats and seafood. The new me, isn't timid and afraid. The new me realizes that the only way I can move forward is to push my boundaries, take chances, and learn from my mistakes. So the other night when my mom suggested for me to make scallops, I swallowed my fear, took a deep breath, did a bit of research and threw myself in!

I found a delicious-sounding recipe for Seared Scallops with Bacon from Martha Stewart, that sounded simple, easy to execute and, even better, we had all the ingredients! I was most nervous about the the final texture of my scallops, as overcooked scallops can result in hard, rubbery, and dry scallops...not exactly what I was looking for. So instead of slicing the scallops in half as the recipe suggested, I left the scallops whole so that I they would cook a little slower, and I would have a bit more control. The final product turned out great! My scallops were perfectly cooked, light and tender and full of so much flavour from the smokey bacon, sweet yet mild shallots, and white wine. With its beautiful presentation, this recipe would be a great show-stopper to serve to company or even to your own family during the week!

Ingredients:
4-6 slices bacon, cut into 1/4-inch pieces
1 pound large sea scallops, cleaned with tough white muscle removed
2 shallots, minced
1 cup white wine
salt and pepper to season

Directions:
1. In a large saute pan set at medium-low heat, add the bacon. Cook slowly, stirring frequently, until brown and crisp, about 8 minutes. Remove bacon with a slotted spoon, and transfer to a paper-towel-lined plate.

2. Drain excess fat, leaving a thin coat on the bottom of the pan. Increase heat to medium, add scallops to pan, and sprinkle with salt and pepper to taste. Cook until golden brown and opaque, about 2 minutes per side.

3. Transfer scallops to the serving dish, drain any excess liquid, leaving a small layer in the pan, and add shallots to pan. When shallots are translucent, add white wine; scrape browned bits from bottom of pan with a wooden spoon. Cook until liquid is reduced by half, 3-4 minutes. Stir in butter, and pour over scallops. Top with reserved bacon. Serve alongside my Balsamic-Glazed Green Beens and Shallots.

Listening To:
The Knife - Pass This On (Original Mix)

Powered by mp3skull.com

Tuesday, March 2, 2010

Creamy Cheesy Halibut

This is one of those easy, go-to dinners that is satisfying and fast, making it a perfect weeknight dish! Light halibut is taken to a whole new level with a creamy cheesy topping, adding tons of flavour and a fantastic smooth texture. I took the recipe for Heavenly Halibut from allrecipes.com, and switched it up slightly to cater to what I had on hand. Experiment and try your own version of this tasty dinner!

Ingredients:
2 pounds skinless halibut fillets
1/2 cup grated parmesan cheese
1/4 cup butter, softened
3 tbsp mayonnaise
2 tbsp lemon juice
1/2 of a yellow onion, chopped
1/4 tsp salt
1 dash tabasco sauce

Directions:
1. Preheat the oven to broil.

2. In a small bowl, combine the cheese, butter, mayonnaise, lemon juice, salt and tabasco sauce. Set aside.

3. In a greased baking dish, lay out the chopped onion evenly and set the halibut fillets on top.

4. Broil the halibut and onions for about 8 minutes, or until fish flakes easily with a fork.

5. Remove from oven and spread creamy mixture evenly over fish. Place back in oven and broil for another 2 minutes, or until slightly browned on top.

Monday, October 19, 2009

Maple Glazed Salmon

Maple Glazed Salmon is one of those super simple, fast, and delicious dishes that is the perfect mid-week dish. It contains simple ingredients that are on hand in most kitchens, and does not require any rigorous preparation. It is light and tasty and makes for a well rounded meal when served with vegetables and a type of grain. This time I made the salmon with sticky rice, asian slaw, and steamed asparagus with parmesan shavings. This dish can also easily be adjusted for more or less servings.

Ingredients:
1/4 cup maple syrup
4 tsp grainy mustard
4 tsp soy sauce
2 Il salmon fillet
pepper to season

Directions:
1. In a bowl, whisk the maple syrup, grainy mustard, and soy sauce until combined.

2. Season salmon fillets with pepper and lay in one layer in a baking dish.

3. Spoon the glaze over the fish reserving a few tablespoons.

4. Bake fish in a 400º oven for about 10 minutes, or until fish flakes easily.

5. Serve with reserved glaze drizzled on top.

Tuesday, September 22, 2009

Baked Tilapia with Spicy Mango Salsa

The summer is nearing an end (the first day of fall is today at 5:18 PM!), and where most people have begun to bring out their cozy sweaters and cute Fall loafers, I am currently wearing shorts and tomorrow I will wear sandals! Yup, I'm in denial! I don't want to believe that summer will come to an end and it is evident not only in my dress, but in my cooking as well. This lead me to create this tropical themed meal, of light and flaky tilapia, with a bright, juicy, and spicy mango salsa to accompany it. Just eating this meal made me feel like I was being transported to a beach, eating dinner under a beautiful sunset!

I used my basic tilapia marinade, altering it slightly to mimic the flavours of the salsa. The Mango Salsa recipe is an adaptation of a mango salsa recipe from The Joy of Cooking (my new favourite cookbook!!). The salsa is delicious combining the sweet flavour of the mango, with spicy jalapenos, and zesty shallots, making this dish stand out as something extra special! I paired the tilapia and salsa with steamed asparagus and a simple whole wheat couscous with dried cranberries to balance out the plate. This meal is truly a show stopper, perfect for your next dinner party!
Tip: Layer eat part of the meal on top of each other to create a beautiful presentation. Begin with the couscous, placing the tilapia on top allowing the couscous to peak out, then top with salsa and asparagus. Garnish with slices of fresh lime and parsley.
Tip: I always keep jarred jalapeno peppers in my fridge. They are great to have on hand to throw into recipes, and they keep for a long time. You may use fresh or jarred jalapeno peppers in this recipe.

Ingredients:
Spicy Mango Salsa
1 large ripe mango, peeled, pitted,
1 small (or 1/2 a large) red bell pepper
1 shallot, minced
1/4 cup fresh lime juice
1/4 cup fresh parsley, chopped
1 garlic clove (minced or pureed)
2 tbsp orange juice
about 2 tbsp finely chopped jalapeno pepper
salt and pepper to taste

Lime Balsamic Tilapia
4 tilapia fillets
2 garlic cloves (minced)
1/2 cup fresh parsley (chopped)
1/2 lime (including zest)
3/4 cup olive oil
1/4 cup balsamic vinegar
1 tbsp dried oregano
1/2 tsp black pepper
2 dashes Tabasco sauce

Directions:
Spicy Mango Salsa
1. Cut the mango and red bell pepper into a medium size dice. Set aside.

2. In a small bowl whisk together the minced shallot, lime juice, garlic, and orange juice. Set aside

3. In a large bowl, combine the mango, red pepper, parsley, and jalapeno. Pour the reserved juice, garlic, and shallot mixture on top and careful mix to combine.

4. Season with salt and pepper and place in fridge to chill while preparing tilapia.

Lime Balsamic Tilapia
1. Place parsley, lime zest, and garlic into a jar. Squeeze in lime juice

2. Add olive oil, balsamic vinegar, oregano, pepper, and Tabasco sauce. Tightly close jar with lid and shake well.

3. Salt and pepper both sides of the tilapia fillets and, in a shallow dish, pour the marinade over top. Marinate for 20-30 minutes.

4. Bake tilapia at 350º for 25-30 minutes. Serve with spicy mango salsa on top, pouring the juices from the salsa over the tilapia.